My imagination always produces more ideas than what can actually be accomplished in the summer months: reorganizing and painting my studio, getting a new website and blog started, making new samples for the new book, e-publishing previous books, as well as the basic home chores such as yard maintenance, planting a vegetable garden, repairing and painting windows, etc., AND two college girls moving in and out in a matter of two months leaving intermittent waves of debris.
I've made progress in the studio; applied water sealant to old cement basement walls and finished off with a few coats of bright spring green, sealed the original cement floor and finished it with a bluestone paint that will be easy to sweep, painted trim molding for the windows (though it isn't up yet), and refurbished some white cabinetry by adding some brushed metal legs and drawer pulls from IKEA.
For each section of the room I've had to move furniture, boxes of fabric, bags with projects, from one side of the room to the other to get at the area I'm working on. Fortunately, it forces me to weed out and get rid of things that should have been thrown out long ago. I'll post some pictures in the next few weeks as it looks more complete.

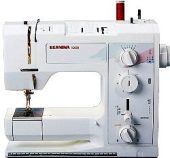
In the midst of this process, I've gotten a new sewing machine, a Bernina 580E! I'm excited to get started with this machine and will schedule guide lessons at my local store, A Common Thread, because even though I'm sure I could figure it out, I want to see what the strengths of this machine are from "those in the know".
I've used a few different Bernina models over the years, most recently the Artista 730E, a dynamo machine with which I made several wearable art pieces (see below). I generally don't feel the need to upgrade because these machines are so dependable and easy to use, but as a Bernina Artisan, I want to represent a current model as I start taking pictures of techniques and new samples for the books and blog.
 A few years ago I bought a Bernina Industrial 950 for doing big projects that needed speed and lots of needle power. This is an awesome powerhouse of a machine that uses the same feet as my 1030. It does most basic stitches including zigzag and blind hem so it is really versatile. It's a great machine for doing Home Dec, especially curtains and bedding with the endless seams.
 For stretch sewing and edge finishing, I have two Bernina overlockers, an older Bernette 234D and a Bernina 1150MDA. The older Bernette is a great standby and I'll sometimes leave it on a particular setting, like a two thread rolled edge, and use the newer one for switching between other settings as I sew.
 The other machine I feel lucky to have is a Cover Stitch machine. I probably would have gotten Bernina's, but a friend gave me her Janome CoverPro 1000CP when she downsized. Who can turn down a great offer like that? If you do much sewing with knits, a cover stitch machine is a great investment for a professional finish. You can get a similar look with a double needle but this kind of machine can be adjusted for feed ratio (differential feed), it also do a three needle cover stitch, and it uses standard sewing machine needles (not a $5 double needle).
In addition to making LOTS of technical outer and activewear garments on these machines, I've made dozens of complex wearable art pieces (some that were in the Bernina Fashion Show before it was discontinued).
This is the back of the jacket and hat from the Kissing Klimt ensemble (the dress was shown in the last post). The waistband, back center panel and cuff inserts are made using a Seminole patchwork technique from cross grain strips of ripped iridescent silk.

To make these pieced panels:
- Tear strips of iridescent silk organza in a variety of colors.
- Fray at least one edge of each strip. With iridescent (or cross-dyed) fabrics, the warp is one color, the weft another, so the strips have textural edges and hue variation (you can see the effect on edges of the sleeve insertions, too).
- With a rotary cutter, cut narrow strips of Misty Fuse ultra light fusible web and pre-fuse the strips (slightly fuse the web to the wrong side of the strips using a non-stick pressing sheet) in the woven area (not in the frayed area).
- Arrange the strips (fusible side down) on a width of light weight silk to use as a foundation layer, slightly overlapping the strips in parallel lines. Leave frayed edges exposed where you like. When you are satisfied with the arrangement, fuse your designed stripe fabric thoroughly. For greater variation of choices, make two or more combinations of striped fabrics to choose from for your piecing.
- Cut triangles or other pattern pieces from your striped fabric(s).
- For circle detail: pre-fuse a variety of small pieces of opaque silks. Cut circles from these fabrics and fuse over your striped panels. These panels also have circular eyelets that pierce through the striped fabric and show the back of the "lining" underneath. Bernina's eyelet maker is perfect for that. You can watch a video here on how the eyelet maker works.
- For a shaped piece like the waistband on this jacket, trace the pattern pieces and draw lines where you want the pieces to be. Use a ruler for dividing evenly and drawing straight. This way you can work out exact spacing where it is needed, like having a piece that is centered at exactly center back. After cutting apart the traced and re-designed pattern, be sure to add seam allowances plus a smidge extra for 'process'when you cut out your new pieces from your fabric. Otherwise your piece will turn out too small. One option (as on this waistband) is to alternate striped panel pieces with solid fabrics that have circle and eyelet details only.


